How to Make Green Tea Kombucha at Home – (First Fermentation)
This post may contain affiliate links. If you make a purchase through these links, I may earn a small commission at no extra cost to you. I only recommend products I personally use and trust. Thank you for your support!
If you’ve ever wanted to make kombucha at home, this simple green tea kombucha recipe will show you how to create a tangy, probiotic-rich drink that nourishes your gut and tastes incredible. You will need just green tea, sugar and happy SCOBY!
Kombucha is one of my absolute favourite fermented drinks, along with ayran. It is lightly effervescent, tangy, alive with culture, and a daily invitation to connect with your gut. Over the years (and many test batches), I’ve refined a reliable, nourishing, and flexible method.
In this post, I’ll walk you through exactly how I make kombucha using loose organic green tea, organic golden cane sugar, and fermenting in a big fermenting jar. I’ll share tips, troubleshooting, science, and ideas for flavouring. Every batch has been tested multiple times, so readers can confidently replicate it.
I first encountered kombucha as a health-food curiosity, but it’s become a ritual over time. There’s something meditative about watching the SCOBY grow, tasting the gradual shift from sweet tea to tangy brew, and bottling fizzy goodness. For me, it’s not just a drink — it’s a small daily act of caring for my gut.
Let’s get cultured!

Kombucha Origins, History & Why It’s Worth the Effort
Kombucha (sometimes called “tea mushroom,” “tea fungus,” or simply “booch”) is a fermented sweetened tea made by a symbiotic culture of bacteria and yeast (SCOBY).
Its origin is debated, but many trace it back to East Asia (China, Korea) some 2,000+ years ago, eventually spreading to Russia and Europe. Traditional kombucha often uses black tea, but green tea is also popular, offering a lighter flavour and a different antioxidant profile.
Why brew your own? Because you control the ingredients — no hidden sugars or additives, and you can adapt fermentation time, flavourings, and strength. Also, homemade kombucha can be more cost-effective and fresher, with active live microbes (if done properly). It’s a small, daily dose of living fermentation for gut health lovers like you and me.
That said, kombucha is not a magical cure-all. While many claims circulate (detox, cancer prevention, etc.), the scientific evidence is still limited and mixed. Read more in this ZOE publication.
We’ll cover what we know below, as well as important safety precautions.
What You Will Need To Make Kombucha At Home?
Here’s what you’ll need (for 1 batch in your 5 L Kilner — scales up/down easily):
- Filtered, non-chlorinated water — chlorine and chloramines can harm the SCOBY. Let tap water sit or use filtered water.
- Loose organic green tea — your base. Green tea brings polyphenols and antioxidants. It’s milder than black tea, so your kombucha will be gentler.
- Organic golden cane sugar, 80 g per litre (so for a 4.5 L batch, 360 g total) — this is food for the yeast & bacteria in the SCOBY.
- Starter tea (pre-fermented kombucha from a previous batch) — typically 10–20 % of volume (so 500–1,000 mL for 5 L). This lowers pH quickly to help prevent contamination.
- SCOBY (your symbiotic colony) — though you describe yours as bought a year ago, it is still alive and well. That’s great!
Equipment
- Heatproof borosilicate jug – this is my jug, for dissolving sugar & steeping tea
- 5 Litre Glass Storage Jar (I use this Kilner or pick any other wide-mouth glass fermenter)
- Breathable fabric or paper towel + rubber band for covering
- pH strips or meter (optional but helpful)
- Bottles (with airtight caps) for storage and secondary fermentation if desired
Ingredient Notes & Substitutions:
- Sugar type: You use golden cane sugar, which is fine. The microbes in kombucha prefer simple sucrose (table sugar) because it’s easiest for them to break down into glucose and fructose. Some people try honey, coconut sugar, maple, etc., but those can slow fermentation or introduce off-flavours. Many kombucha guides recommend plain cane sugar for consistency.
- Tea choices: Green tea is excellent. Avoid heavily flavoured blends, oils, or herbal blends until after fermentation (i.e. in secondary). Use mostly or entirely green leaf tea, or a small blend with black if you want more strength. Avoid teas with added citrus oils or flavourings (they can prevent oxidation and harm microbes).
- Starter tea acidity: It is essential to use old kombucha (starter). If the pH is not low enough initially, undesirable microbes might take hold.
- Minerals: Fermentation might slow if your water is ultra-soft (very low in minerals). You can supplement with a pinch of sea salt or use a small amount of mineral drops, but test batches first.
Regarding nutrition, kombucha is mostly water, with small residual amounts of sugar, organic acids (acetic, gluconic, etc.), trace B vitamins (from yeast), and beneficial microbes. According to this Healthline article, fermentation consumes much of the sugar, leaving the final drink tangy and lower in sugar than the starting blend. Be cautious — over-fermentation or a too-short fermentation can leave too much residual sugar or a very vinegary result.
Preparation Before You Start (Sanitising, Setup, etc.)
- Sterilise everything — glass jug, Kilner jar, utensils, funnel, stirring spoon, etc. Use boiling water or a food-safe steriliser. Cleanliness is your first defence against contamination.
- Prepare your space — ensure a stable, draft-free area with a temperature between ~ 20-25 °C (68–77 °F). Avoid strong direct sunlight or cold corners.
- Measure carefully — I like to weigh sugar and tea so there’s consistency batch to batch.
- Label & track date — always note the start date and target tasting date so you know when to check.
Instructions For Primary Kombucha Fermentation
Here’s a stepwise guide using your method (scaled to 5 L):
Prepare sweet tea
In your borosilicate jug, boil the water (e.g., 1–2 L). Add your loose green tea leaves (say ~1 g per 100 mL — so 50 g in 5 L, but you can scale) and steep for 5–10 minutes (depending on your desired strength). Strain out the leaves.
While the tea is still warm (say 60–70 °C), stir in your sugar (80 g per litre, so 400 g for 5 L). Ensure the sugar fully dissolves.
Cool to room temperature
Before adding the SCOBY, you must let the sweet tea cool to ~ 25–30 °C (or fully room temp). Hot tea can kill or shock the microbes. You can accelerate cooling by placing the jug in an ice bath or by topping up with chilled, filtered water.
Transfer to fermenter + add starter
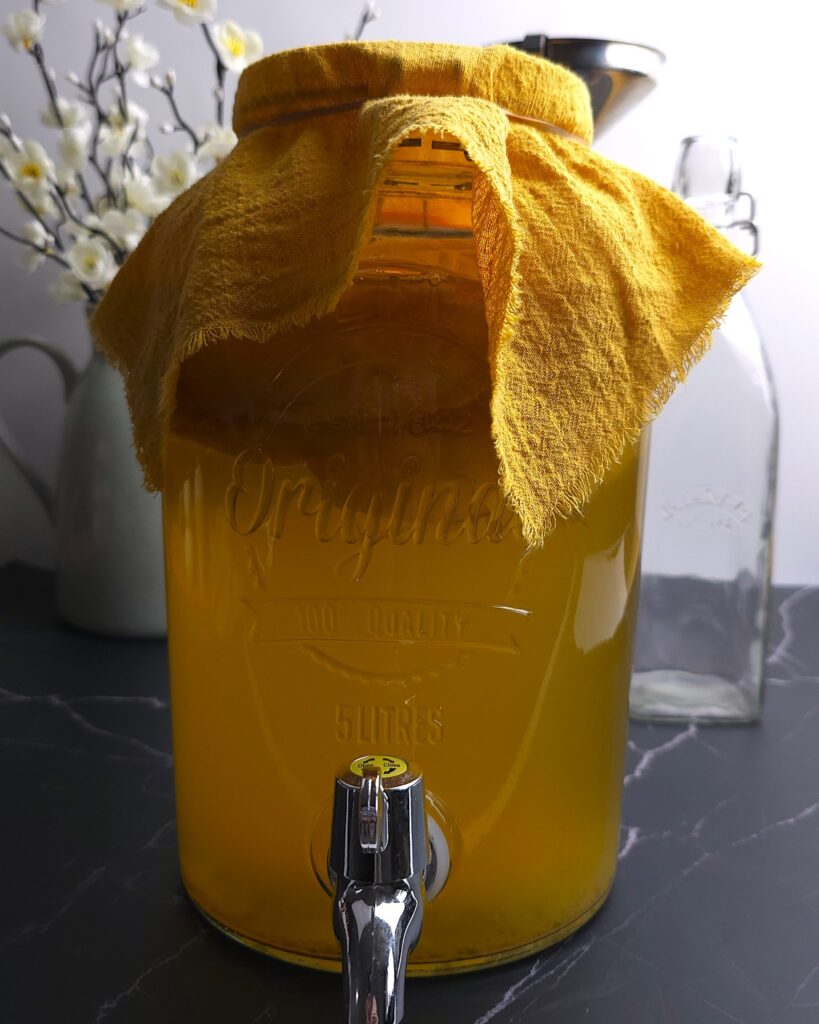
Pour the cooled sweet tea into your sterilised 5 L Kilner jar. Add your starter kombucha (10–20%, i.e., 500–1,000 mL). Gently place the SCOBY on top.
Cover and ferment
Cover the mouth with a breathable cloth or paper towel, then secure it with a rubber band. This allows air exchange but keeps out dust, insects, and debris.
Place the jar in your chosen fermentation spot. Maintain a consistent temperature.
Monitor & taste
From day 5 or so, begin tasting via a straw (insert near the bottom, withdraw a bit). You’ll notice the sweetness fading, a gentle tang developing, and maybe some effervescence. Aim for that sweet-tart balance you enjoy.
After ~7 days, start tasting daily. Many batches are ready at 7–10 days; in a warm environment, you may finish earlier; in cooler spaces, take the full 10 days or slightly longer.
When you’re happy with the flavour (a mild tartness, not overly vinegary), it’s time to move to the next stage (bottle or rest).
Secondary Fermentation (Optional, for Fizz / Flavouring)
If you like a fizzy kombucha or want to add flavour (fruit, herbs, ginger, etc.), a second fermentation is helpful.
Plenty of second fermentation recipes are coming soon!!!!
Kombucha Troubleshooting & Tips
- Slow fermentation / flat flavour: This could be due to low temperature, weak SCOBY, insufficient starter tea, or ultra-soft water.
- Too vinegary / over-acidic: The fermentation has been too long, or the SCOBY is very active. In the next batch, shorten the fermentation or remove it earlier.
- Mould (fuzzy, coloured spots): This is dangerous. Discard SCOBY and batch entirely (don’t risk it). Start over with clean equipment and fresh culture.
- Off smells (sulphur, rotten smells): Sometimes yeast problems occur. That batch may be compromised; proceed carefully.
- Too much residual sweetness: Extend fermentation time.
- Temperature fluctuations: Use an insulating wrap or place the jar in a temperature-stable cupboard.
- SCOBY health over time: If your SCOBY grows thick layers, you can peel off the top wooden “baby” and pass it to friends. If it gets very dark or slimy, retire it and start fresh.
- pH monitoring: A safe kombucha pH should be around 2.8–3.5 at the end. Starting pH (after adding starter) ideally < 4.5.
- Airflow/ventilation: Don’t seal the fermenter; the top must breathe.
- Keep it away from direct sunlight, heat sources or cold drafts.
From my own trials, I’ve found that a 7-day ferment in warmer months (22–25 °C) yields a gentle, pleasant kombucha. Letting it go 9–10 days in cooler months gives better character. I always taste from day 7 onwards.
Why Your Method (80 g per L, green tea, 7–10 days) Works Well
- The 80 g/L sugar ratio provides a solid food source so the microbes can thrive, but (given sufficient fermentation) not leave too much residual sweetness.
- Green tea has a lighter, more delicate finish and good antioxidant properties.
- 7–10 days is a “sweet spot” where flavour develops without over-acidification.
- Your 5 L Kilner gives good surface area, temperature stability, and easy access to taste.
- Using an older, tried-and-tested SCOBY gives you reliability — as long as it’s healthy, it’ll continue producing.
Kombucha Health Claims, Benefits & Cautions
What the science does support (and where it’s speculative)
Kombucha is often celebrated for its probiotics, antioxidants, and possible health benefits. Some evidence suggests it may:
- Support gut microbiome diversity (via beneficial bacteria)
- Provide antioxidant support (via tea polyphenols + fermentation metabolites)
- Aids liver detoxification in animal studies (less evidence in humans).
- Help regulate blood sugar or improve insulin sensitivity in small trials.
- Exhibit antibacterial properties (via acetic acid, low pH).
However, many health claims (cancer prevention, detox “magic”, etc.) remain unproven in robust human trials.
Risks and Cautions
- If prepared poorly, homemade kombucha can become contaminated with harmful bacteria or mould.
- Because it’s acidic, it can erode tooth enamel over time.
- There may be trace alcohol (commercial versions aim for < 0.5 % ABV, but homemade batches can go higher if over-fermented)
- Individuals who are immunocompromised, pregnant/nursing, or with specific conditions should consult a healthcare provider before regular consumption.
- Overconsumption (large volumes daily) may cause digestive upset or acidity issues.
In summary: kombucha is a lovely wellness drink if brewed carefully and consumed moderately — but it’s not a panacea. Always prioritise food safety and balance.
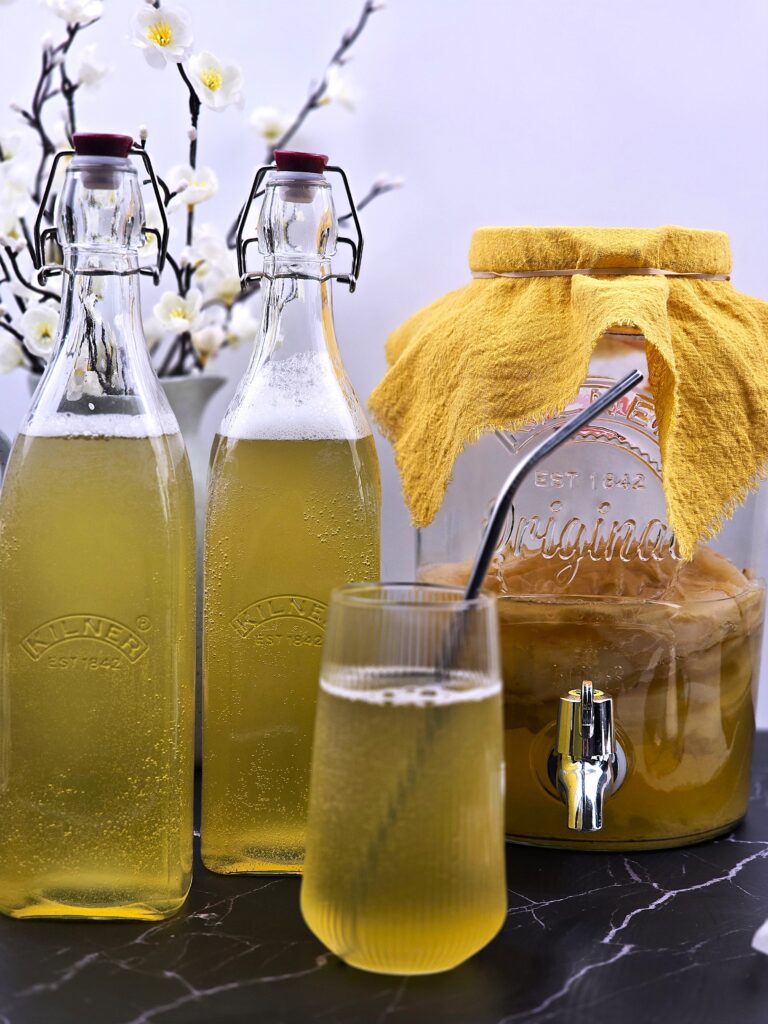
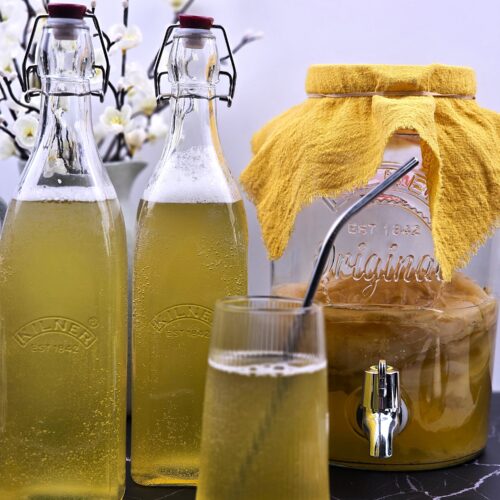
Homemade Kombucha Presentation, Serving & Storage
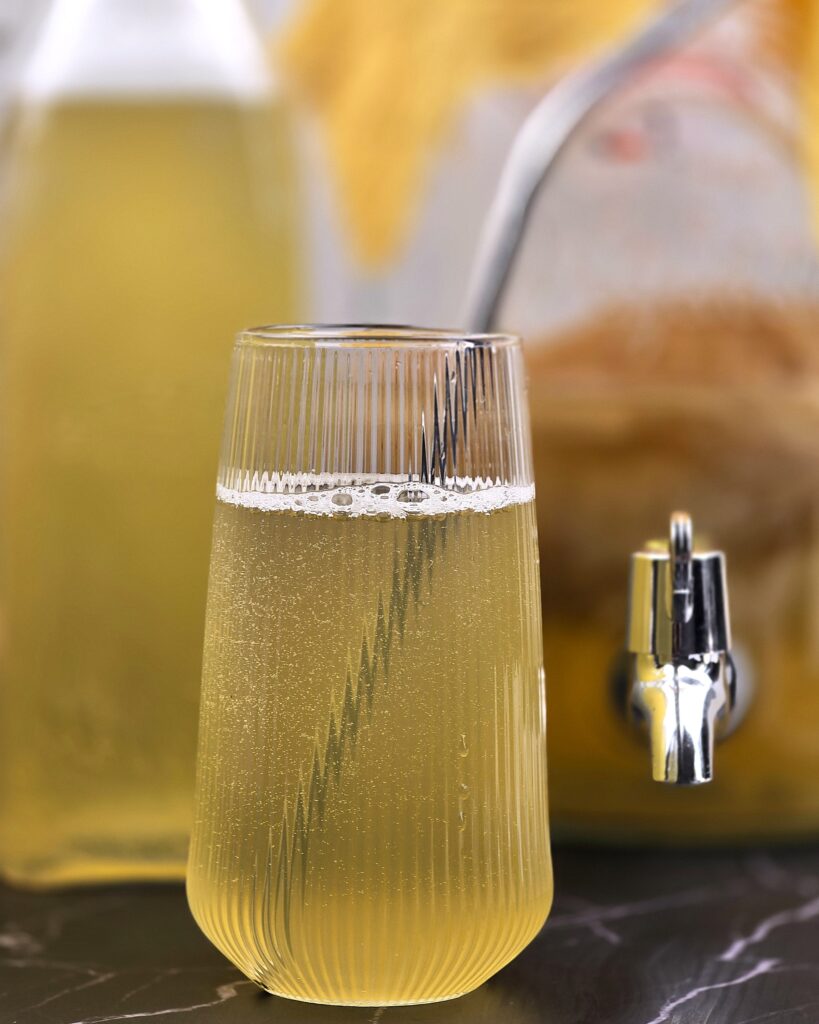
Serve kombucha cold in a glass. If you want to preserve the fizz, garnish it with herbs or slices of fruit (for light flavouring). Use clear or tinted bottles that seal well.
Once bottled (after secondary fermentation if using), refrigerate. This slows fermentation and preserves flavour. For the best flavour, consume within 1–2 months (though many people finish faster).
If a bottle feels too pressurised, gently “burp” it (open briefly) to release excess CO₂.
For serving size, many drinkers enjoy ~ 120–240 mL (4–8 oz) per serving, once or twice a day. Don’t overdo it.
Kombucha Variations & Creative Ideas
- For subtle complexity, try blending different teas (green + sencha, gunpowder green, oolong).
- After primary fermentation, flavour with ginger, berries, hibiscus, citrus peels, herbs, or spices during secondary fermentation.
- Try “continuous brew”: keep your SCOBY in a large vat and draw off some each week, topping up with new tea—it’s more advanced but convenient for regular drinkers.
- Use oak chips or wood staves for barrel-like notes.
- Experiment with temperature or fermentation time to achieve different levels of sourness.
- Aim for a longer fermentation time for lower-sugar versions, but be careful not to push too far.
Recipe Summary / Workflow
- Sterilise all equipment.
- Boil some water, steep loose organic green tea, and strain.
- Dissolve sugar (80 g/L) in warm tea.
- Cool to room temperature.
- Pour into a 5 L jar and add starter kombucha (10–20 %).
- Add SCOBY gently.
- Cover with cloth, ferment 7–10 days while tasting.
- When the taste is right, remove the SCOBY + starter.
- Bottle (optional second ferment with flavours) or refrigerate.
FAQs
1. Can I use herbal teas instead of green tea?
It’s best to use true teas (green, black, oolong) for the primary ferment because they contain nutrients (nitrogen, tannins, minerals) that feed the SCOBY. Herbal teas often lack these, which can lead to weak or failed ferments. You can add herbal flavours during secondary fermentation.
2. Why 80 g sugar per litre? Can I reduce the sugar?
Yes, you can experiment. But starting with a reliable sugar level ensures your microbes have enough fuel. Reducing sugar too much can slow fermentation or produce underdeveloped kombucha. In time, you may test slightly lower sugar levels.
3. My kombucha turns out too vinegary or sour — what went wrong?
There is likely over-fermentation (left too long) or too-warm temperature. Shorten your ferment time or taste daily starting on day 7. Use cooler conditions or reduce batch size if needed.
4. How do I store or care for my SCOBY long-term?
Keep your SCOBY in a “SCOBY hotel” — a jar with some starter kombucha covered with a cloth. Refresh with new sweet tea occasionally. In the short term, you can also dry or refrigerate it (in fresh kombucha or starter liquid).
5. What signs of spoilage should I watch for?
Watch for fuzzy mould (blue, green, black bits), unpleasant rotten smells, or colour changes beyond normal. If in doubt, discard. Always follow sanitation and avoid contamination.
6. How fizzy should kombucha be, and can bottles burst?
It can be lightly to moderately fizzy. Yes, bottles can burst if overpressurised, especially glass swing-top bottles. Use sturdy bottles, leave some headspace, and “burp” if pressure builds.
7. When is kombucha “too alcoholic”?
Homemade kombucha typically has a low alcohol content (<1%), but prolonged fermentation or high temperatures can raise it. If the taste is overtly boozy or strong, you may have over-fermented. For safety, keep ferment times moderate and test your batches to suit your taste.
8. Can I reuse the same SCOBY indefinitely?
You can if it remains healthy. Over time, layers can build up; you may peel off the top layer for new batches. If it darkens, becomes slimy or weak, retire it and start with a fresh one.
Nutrition Estimate / Facts (Approximate)
It’s difficult to pinpoint precisely, but a rough estimate per 100 mL:
- Energy: ~ 10–25 kcal (depending on residual sugar)
- Carbohydrates (sugars): low (much reduced by fermentation)
- Organic acids: acetic, gluconic, etc.
- Trace B vitamins (from yeast)
- Very low (if any) alcohol
- Water + live microbes
Because fermentation reduces much sugar, kombucha ends up a light, tangy, low-sugar drink — but don’t treat it as calorie-free.
In Conclusion
Making kombucha with your setup — loose organic green tea, 80 g cane sugar per litre, 5 L jar, 7–10 days — is a solid, reliable method. Each batch teaches you something new: about your own ambient temperature, how tangy you prefer it, how your SCOBY behaves, and how you like to flavour each bottle.
I encourage you to start with this method, document results, and adjust gently from batch to batch. Fermentation is a dialogue between brewer and microbes. Trust your taste, safeguard sanitation, and enjoy the process.
Happy brewing — and don’t forget to share your kombucha journey on the blog!
Fancy a Freebie?
Subscribe for my newsletter
and get your FREE eBook with 7 delicious gluten-free desserts!
*We will only send you gluten-free, lactose-free, refined sugar-free emails; you can unsubscribe anytime. Read our Privacy & Cookie Policy.

How to Make Green Tea Kombucha at Home – Tested Method and Perfect Ferment
Equipment
Ingredients
- 4.5 L Water filtered or dechlorinated
- 50 g Green tea organic, loose or 10 standard green tea bags
- 360 g Golden cane sugar organic, 80 g per litre of tea
- 500 ml Kombucha starter from previous batch, or with the ordered starter
- 1 SCOBY organic
- Clean breathable cloth + rubber band for covering the jar
Instructions
- Sterilise everything. Wash and rinse your Kilner jar, jug, and utensils thoroughly. Use boiling water or a mild sterilising solution, then air-dry. Cleanliness is key to preventing contamination.
- Prepare the sweet tea. In your borosilicate jug, pour 1–2 litres of boiling water over the loose green tea. Let it steep for 5–10 minutes, depending on desired strength, then strain.
- Dissolve the sugar. While the tea is still warm, stir in the organic cane sugar until fully dissolved.
- Top up and cool. Add the remaining water (room temperature) to reach 4.5 L total. Let the mixture cool completely before adding the SCOBY — hot tea can harm it.
- Combine and start fermenting. Pour the cooled sweet tea into the 5 L Kilner jar. Add the starter kombucha and gently place the SCOBY on top. Cover with a clean breathable cloth secured by a rubber band.
- Ferment for 7–10 days. Place the jar in a warm (20–25 °C), shaded spot. Avoid direct sunlight or cold drafts. Taste from day 7 onward — stop when it reaches your ideal balance of sweetness and tanginess.
- Check and bottle. When the flavour is right, remove the SCOBY and about 500 ml of kombucha for your next batch. Pour the rest into bottles. You can flavour it with fruits, herbs, or ginger and seal for a 1–3 day second fermentation if you like it fizzy.
- Refrigerate and enjoy. After secondary fermentation, refrigerate to slow further activity.
- Serve chilled in glasses and enjoy your gut-friendly sparkling drink!
Notes
- Your SCOBY can be reused indefinitely if kept healthy.
- A pH below 4.5 after adding the starter ensures safe fermentation.
- Taste daily after day 7 — the longer it ferments, the less sweet and more acidic it becomes.
- If you spot mould (fuzzy, coloured patches), discard the batch and sterilise your equipment.
- Kombucha contains trace alcohol (usually < 1 %), so keep bottles refrigerated after fermenting.
- Use only plain teas (green, black, oolong) — do not use flavoured or oily blends, as they can harm the culture.
YourDani x x
Mention @deglutenistanutrition and tag #deglutenistanutrition — you’ll make my day! 🌿✨


Thank you for stopping by! I’m Dani!
nutrition student | Healthy Live Promoter | Gluten-free recipe developer
Welcome to DeGlutenista Nutrition!
Your visit really means the world to me. I’m happy to share simple, nourishing gluten-free recipes and practical food tips focused on gut health and clean eating, all with an emphasis on reducing ultra-processed ingredients.
My approach is simple: practising mindful eating, regardless of food sensitivities, can be both tasty and healthy.